Let’s be real – we’ve all been there.
You take what feels like the perfect selfie, only to notice that one annoying blemish photobombing your shot or realize the lighting is doing absolutely nothing for your glow.
Enter Facetune, the app that’s been quietly changing how 200M+ people present themselves online.
But here’s what makes Facetune different from those basic filter apps – it’s not about creating a completely fake version of yourself.
It’s about enhancing what’s already there, so you can share photos that really show how amazing you feel on the inside.
Ready to see some mind-blowing transformations?
Let’s get into real Facetune before and after examples that show the power of smart editing.
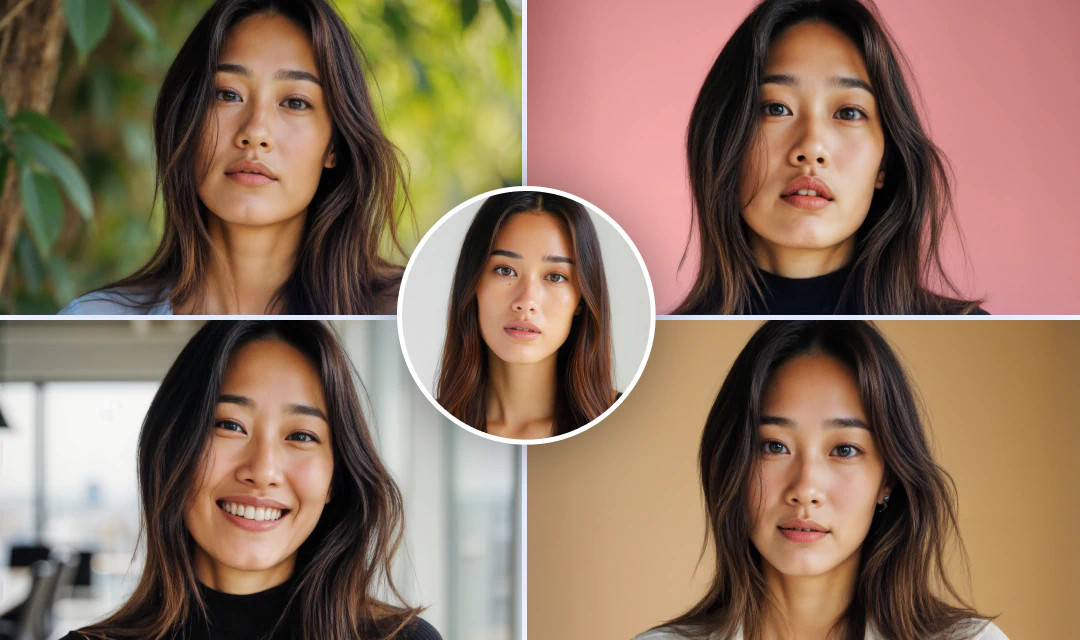
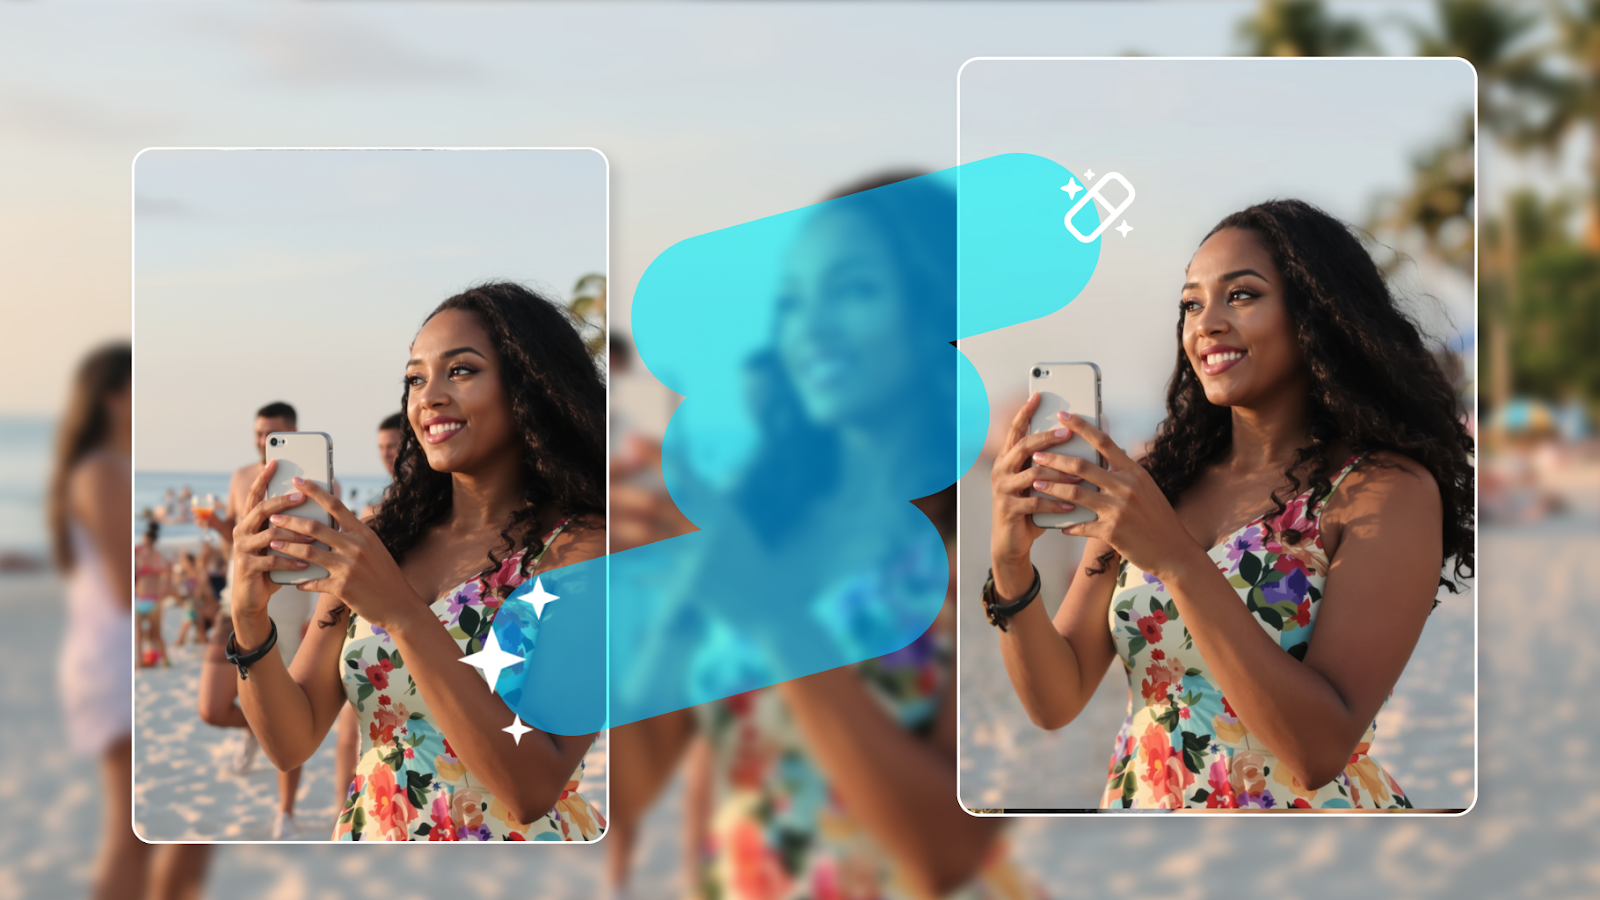
{{cta-banner-images}}
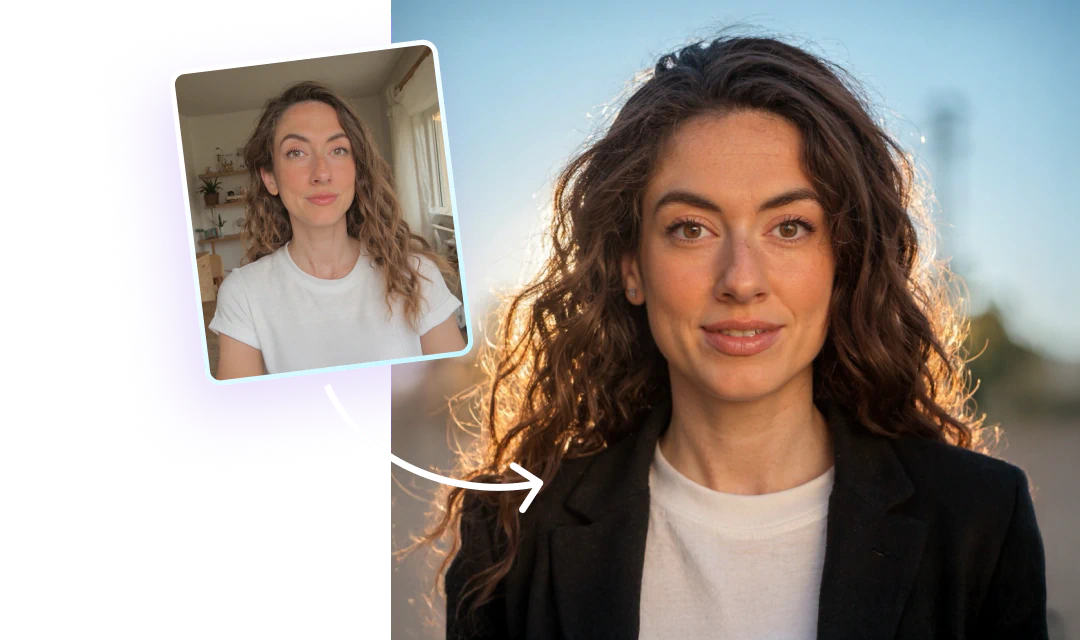
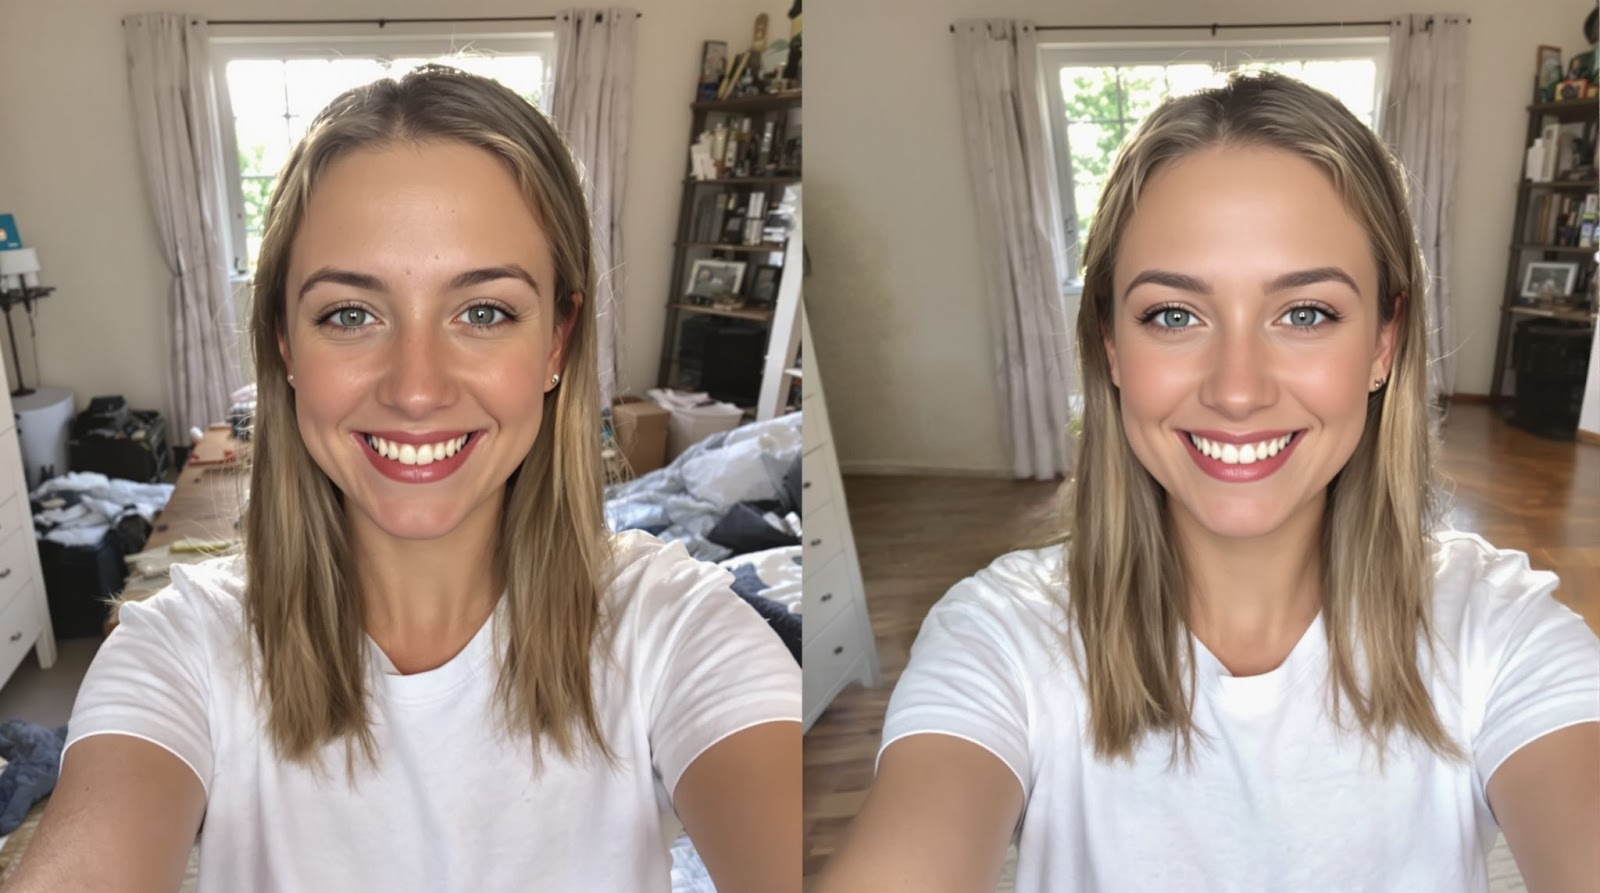
Facetune Before and After For Faces
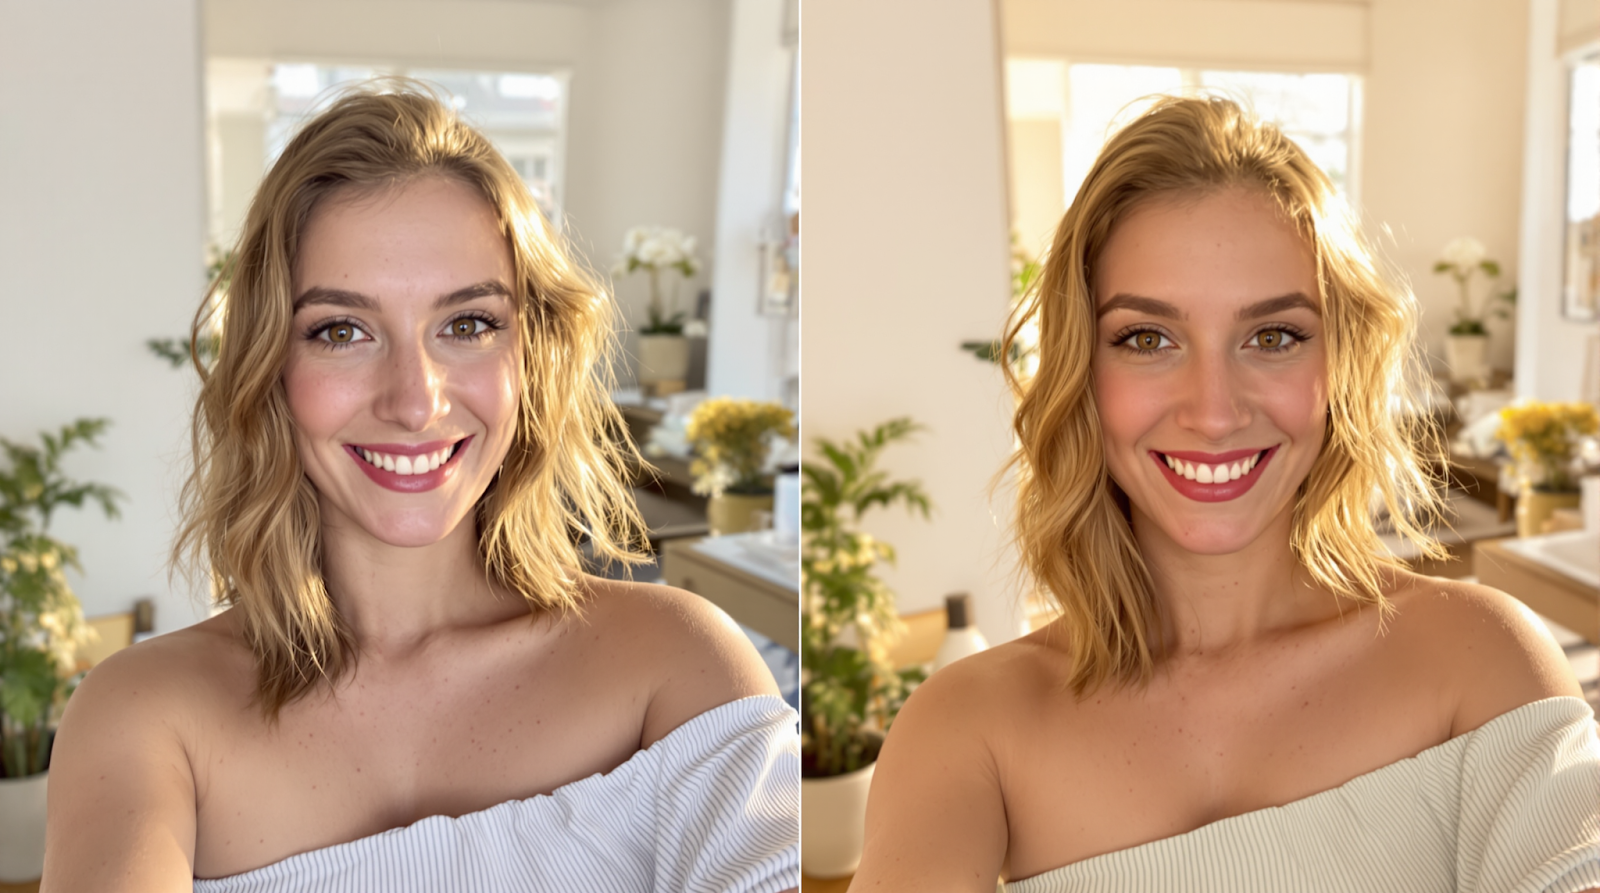
When it comes to face editing, the best transformations are the ones where people can’t quite put their finger on what changed – they just know you look absolutely stunning.
That’s the sweet spot Facetune’s face editing tools hit every time.
The “Effortless Glow-Up” Transformation
Picture this: A before photo with dull skin, dark under-eye circles from a Netflix marathon, and a few breakouts from that questionable late-night snack choice.
The after? Smooth skin that looks like you just got back from a spa weekend, bright eyes that sparkle, and that natural glow we all wish we woke up with.
The magic happens with:
- Smooth to even out skin texture while keeping it natural
- Conceal for those under-eye circles that tell the world about your 3 AM TikTok scrolling
- Heal to spot-treat blemishes without leaving obvious editing marks
- AI Enhance for that overall glow
Pro tip: The key to natural-looking face edits is restraint. You want people to think “Wow, they look amazing!” not “Wow, they definitely edited this.”
Facetune Before and After For Body
Let’s talk about body editing – because yes, it’s a thing, and yes, it can be done tastefully.
The best Facetune body transformations aren’t about creating an unrealistic body.
They’re about enhancing your favorite features and feeling confident in your own skin.
The “Perfect Posture” Effect
Ever take a photo where you’re slouching without realizing it?
Or where your outfit isn’t sitting quite right?
Facetune’s body editing tools can help you achieve that “standing tall and confident” look that photographs beautifully.
Common body transformations include:
- Smoothing out clothing wrinkles that distract from the overall photo
- Subtle waist definition that enhances your natural silhouette
- Posture adjustments that make you look more confident and poised
- Overall photo enhancement that makes everything look more polished
Reality check: The most stunning transformations happen when you’re enhancing your natural beauty, not trying to become someone else entirely.
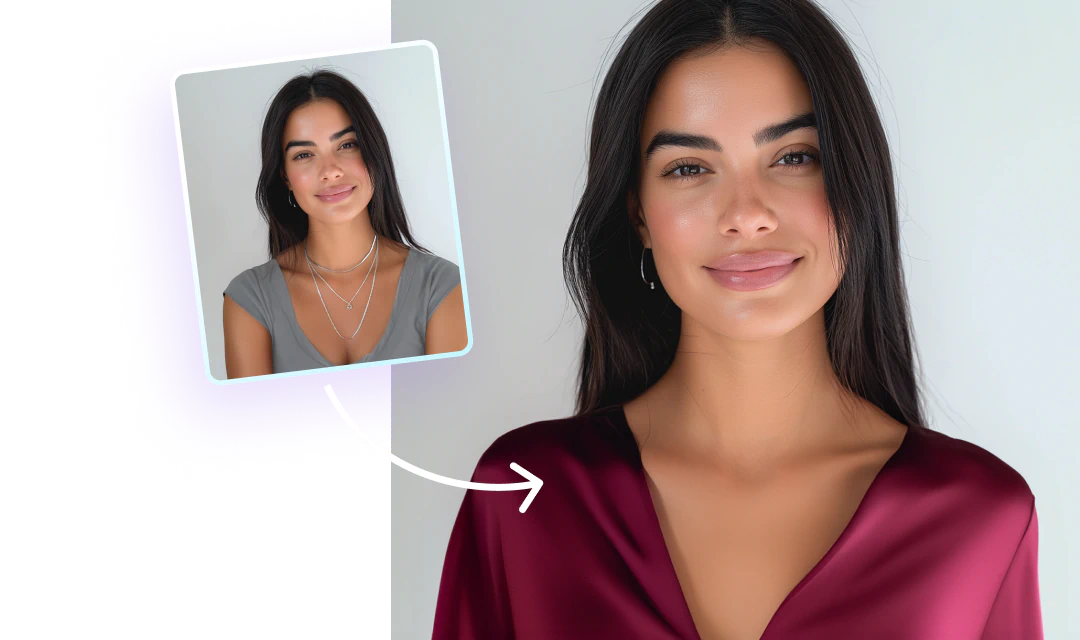
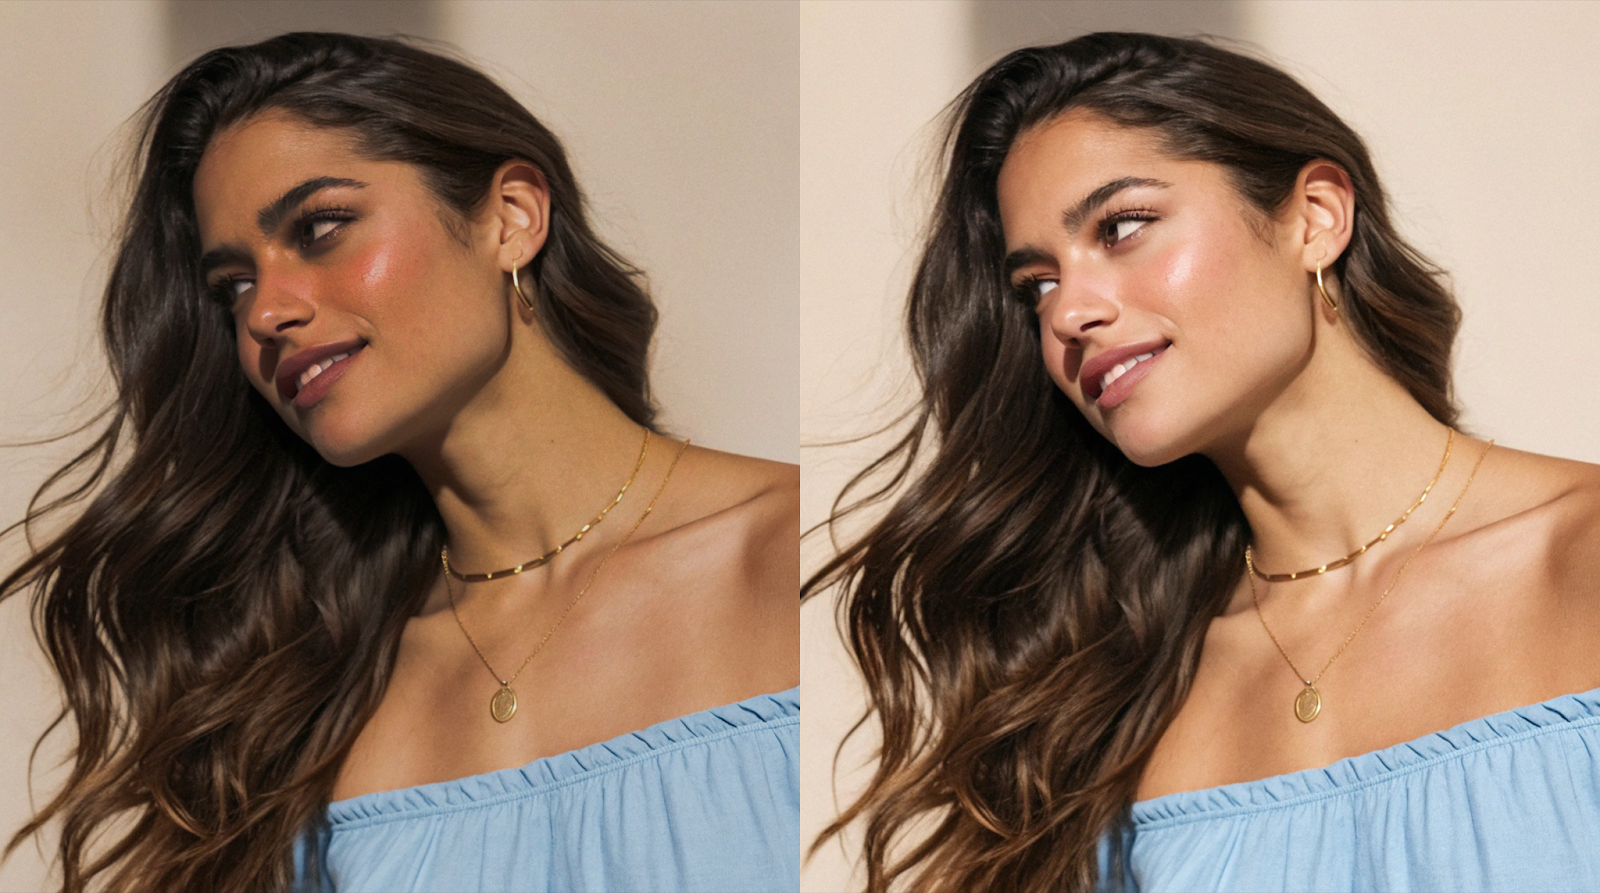
Facetune Before and After On Instagram
Instagram has definitely changed the game when it comes to photo standards.
But here’s the thing – you don’t need to be a professional photographer to create scroll-stopping content.
Sometimes you just need the right editing tools and a good eye.
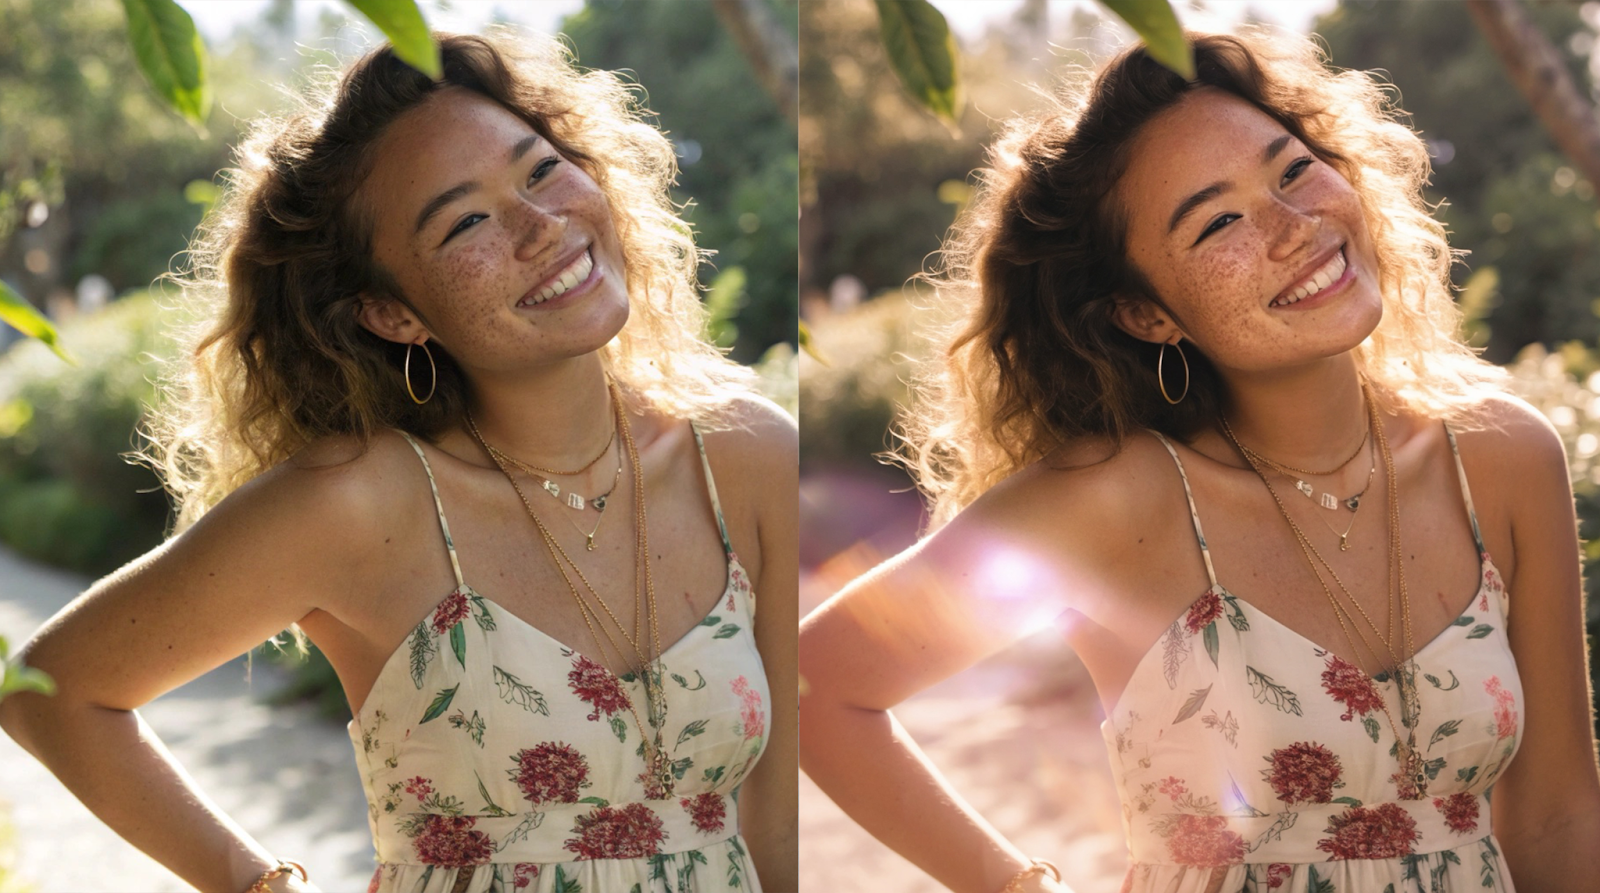
The “Professional Photo Shoot” Vibe
We’ve all seen those Instagram posts that look like they were shot by a professional photographer, even though you know they were taken with an iPhone in someone’s bedroom.
That’s the power of smart editing combined with good lighting and composition.
Typical Instagram transformations include:
- Color correction that makes everything look more vibrant and cohesive
- Background enhancement that eliminates distractions
- Lighting adjustments that create that golden hour glow
- Professional-quality retouching that elevates the entire image
The secret sauce: Consistency is key.
The most engaging Instagram feeds have a cohesive editing style that becomes part of their personal brand.
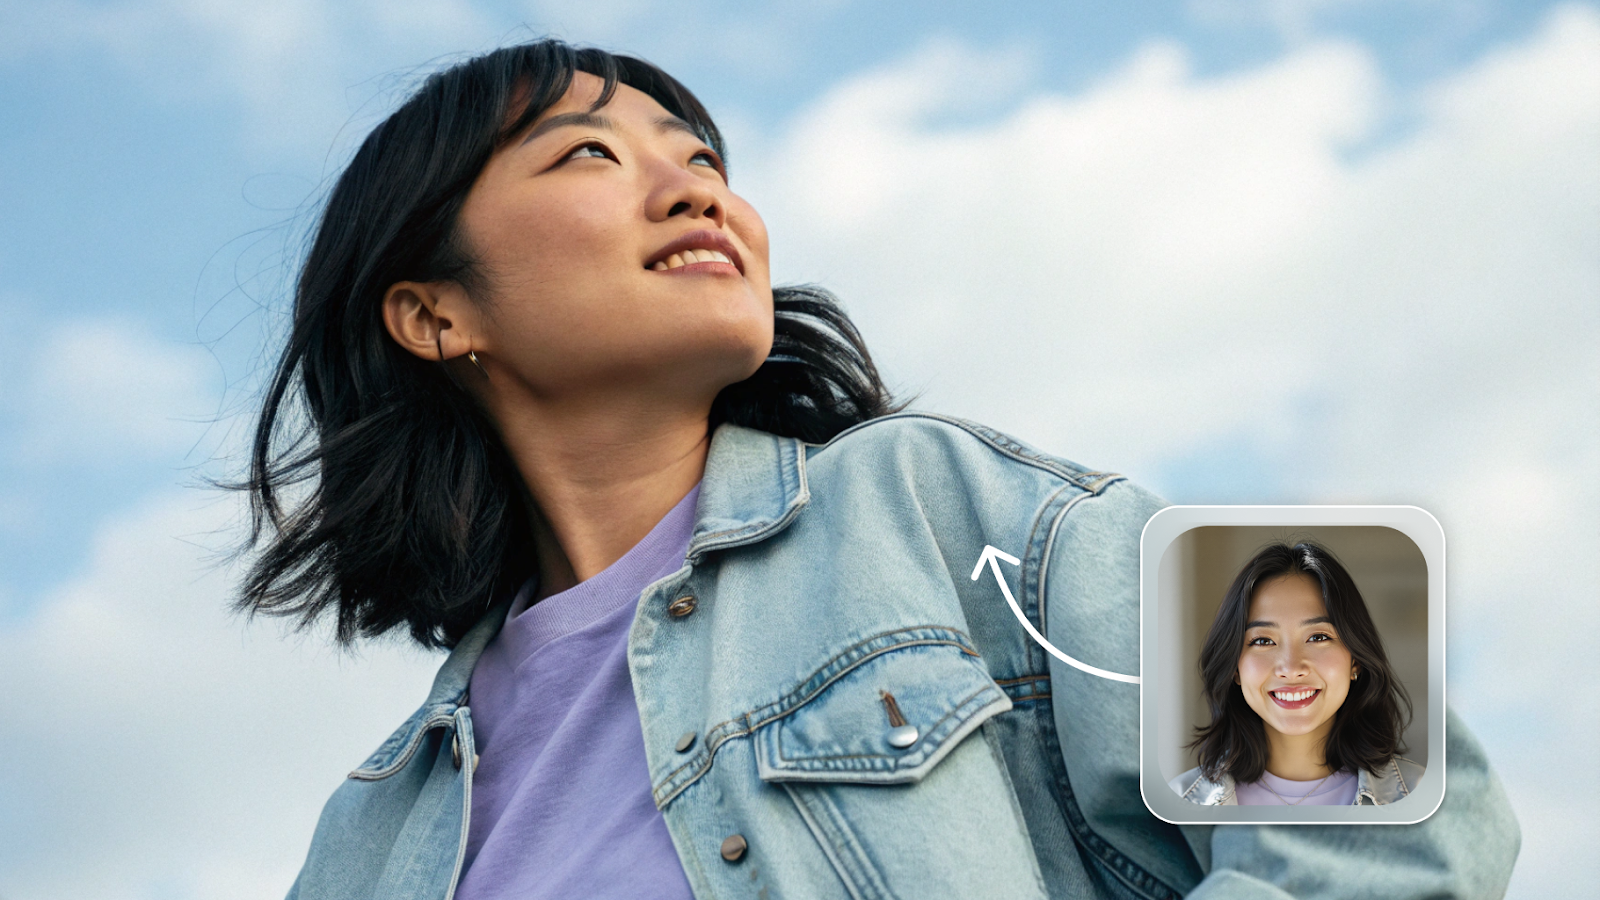
{{cta-banner-images}}
Facetune Before and After Examples
Nothing beats seeing actual transformations from real people.
Here’s what makes Facetune users’ before and after photos so compelling:
The “Confidence Transformation”
Before: A selfie taken in harsh bathroom lighting with tired skin and a hesitant smile.
After: The same person with glowing skin, bright eyes, and a confident smile that radiates self-assurance.
The “Professional Headshot Upgrade”
Before: A casual photo that’s fine for personal use but not quite professional enough.
After: A polished headshot that would look right at home on LinkedIn or a company website.
The “Event-Ready Glamour”
Before: A great photo that just needs a little extra something for that special occasion post.
After: Red-carpet ready glamour that still looks authentically you.
The “Travel Photo Perfection”
Before: An amazing vacation shot where you look tired from the long flight.
After: The same incredible location with you looking as refreshed and excited as you actually felt.
The Science Behind Facetune Before and After Photos
Here’s something interesting – the best Facetune transformations aren’t just about looking different.
They’re about feeling more confident sharing photos that truly represent how you see yourself.
Why These Work:
- They enhance your existing features not change them
- They help you present your best self to the world
- They level the playing field, everyone can have professional editing
- They’re about self-expression and creativity not just vanity
The confidence factor: When you feel good about how you look in photos you’re more likely to share, connect and express yourself online.
{{cta-banner-images}}
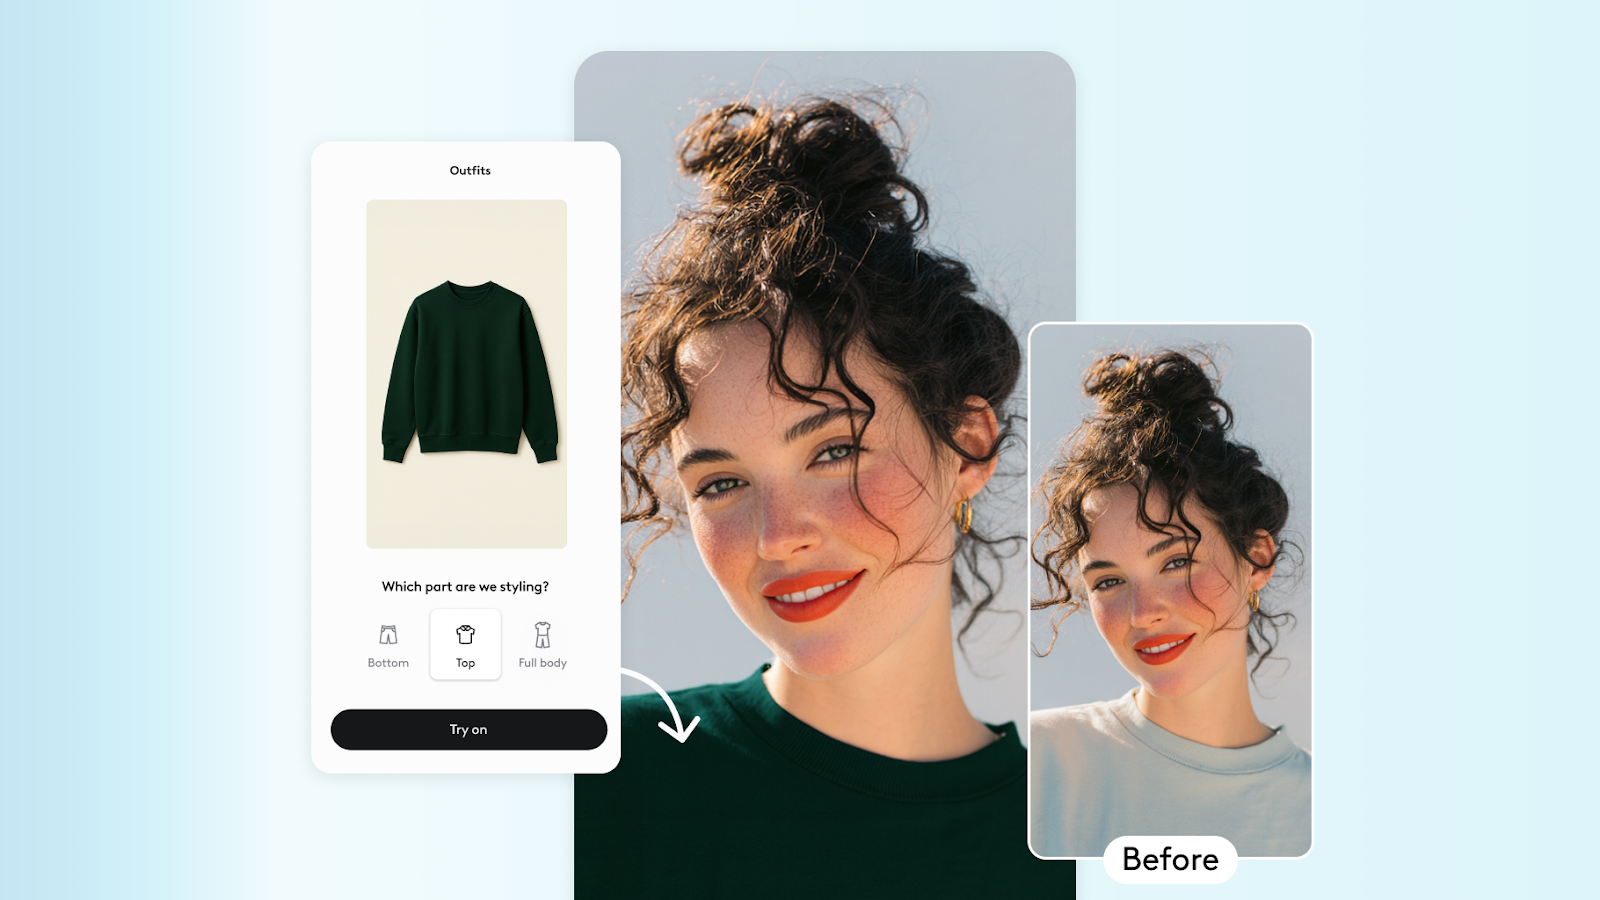
How to Create Your Own Facetune Before and After
Ready to try your own transformation? Here’s how:
Step 1: Start with a good base photo
- Use natural light when possible
- Take photos from your best angles
- Make sure your photo is well composed
Step 2: Choose your editing approach
- Decide what you want to enhance (skin, lighting, overall vibe)
- Start with subtle edits
- Use Facetune’s AI for best results
Step 3: Perfect the details
- Fine tune your edits with adjustment sliders
- Pay attention to overall photo cohesion
- Save multiple versions to compare
Step 4: Know when to stop
- The best edits enhance not transform
- If you can’t recognize yourself you’ve probably gone too far
- Remember authenticity is always in style
The Art of Subtle Enhancement: Less is More
The most stunning Facetune before and after photos have one thing in common – they look natural.
The editing enhances what’s already there without looking artificial.
Rules of natural looking edits:
- Keep skin texture visible while smoothing overall tone
- Enhance eye brightness without making them look unnatural
- Improve lighting and color balance for a professional finish
- Use AI tools that adapt to your features
Golden rule: If someone can tell you’ve edited your photo you might want to dial it back.
Unlike filter apps that apply the same effect to every photo, Facetune uses advanced AI to analyze your specific features and provide personalized enhancements.
This means your edits will always look natural and tailored to you.
What makes Facetune different:
- AI tools that adapt to your unique features
- Professional results with easy controls
- Full editing suite for skin, hair, makeup and more
- 200M+ users sharing tips and inspiration
{{cta-banner-images}}
Your Transformation Starts Here
The beauty of Facetune before and after isn’t just in the dramatic difference – it’s in the confidence you get from showing the world your best self.
Whether you’re editing a casual selfie or content for your professional brand, the right tools make all the difference.
Remember, it’s not about perfection – it’s about authenticity with a little extra sparkle.
The best transformations happen when you enhance what makes you uniquely beautiful, not try to be someone else.
Ready to see your own transformation?
Download Facetune and join millions of users who’ve discovered that the perfect photo isn’t about being perfect – it’s about feeling confident enough to share your story with the world.
Because at the end of the day, the most stunning before and after is the journey from hesitation to confidence.
Facetune just helps your inner glow shine a little brighter in every shot.